DIY Car AC Compressor Clutch Repair Made Simple
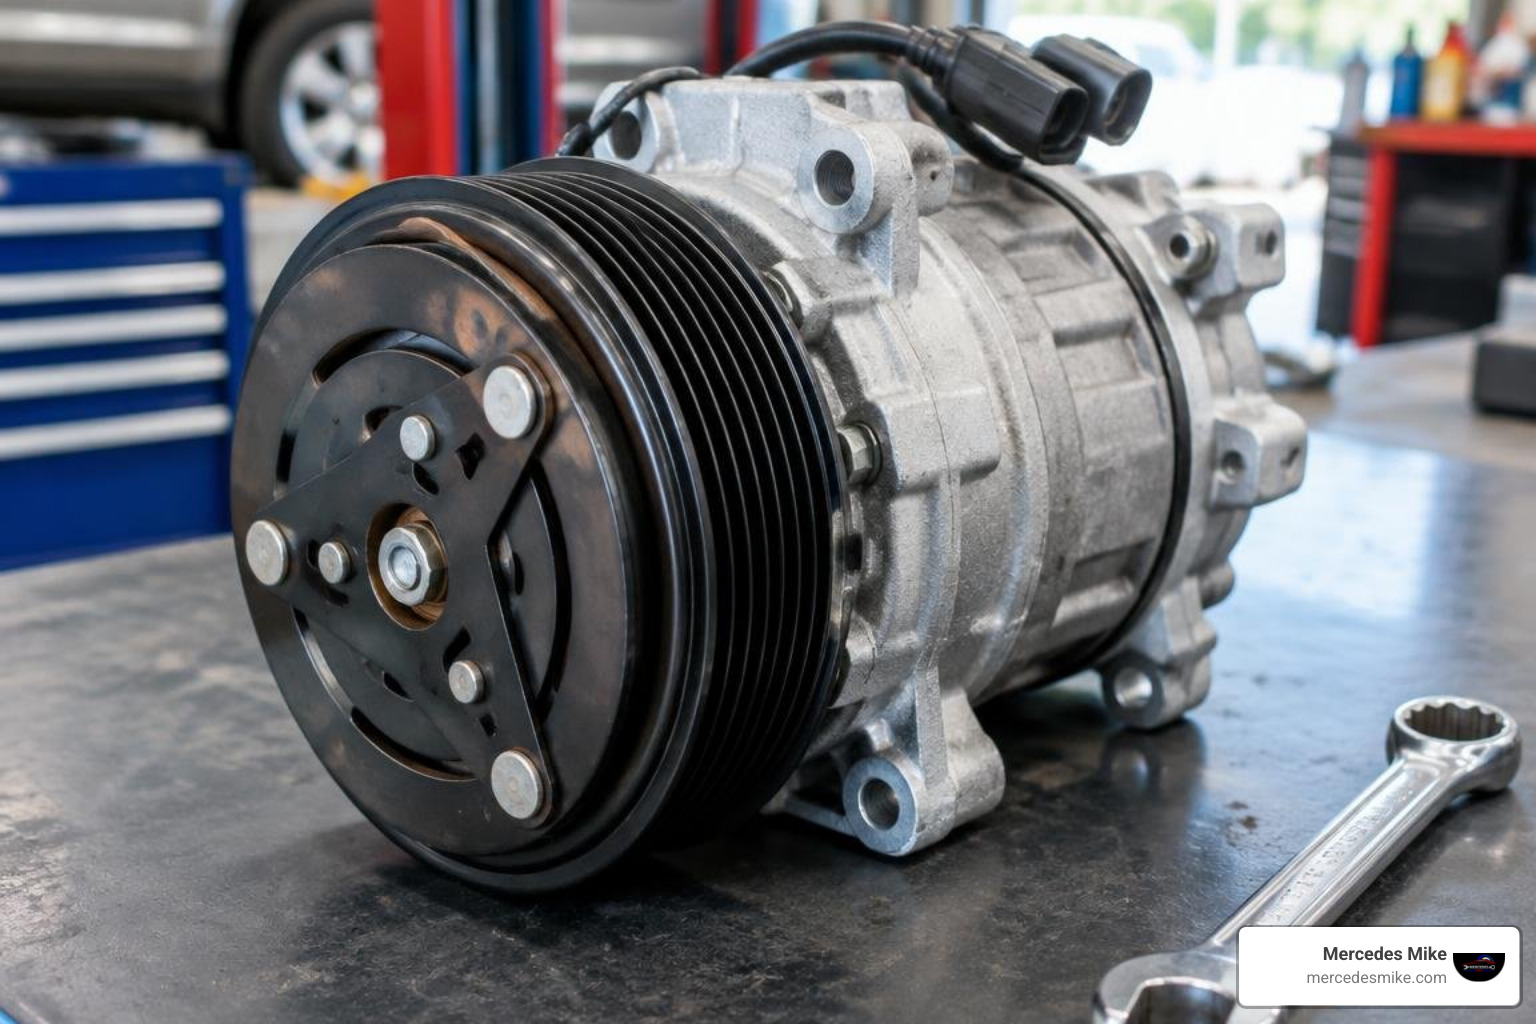
Fix an AC Compressor Clutch Without Replacing the Compressor
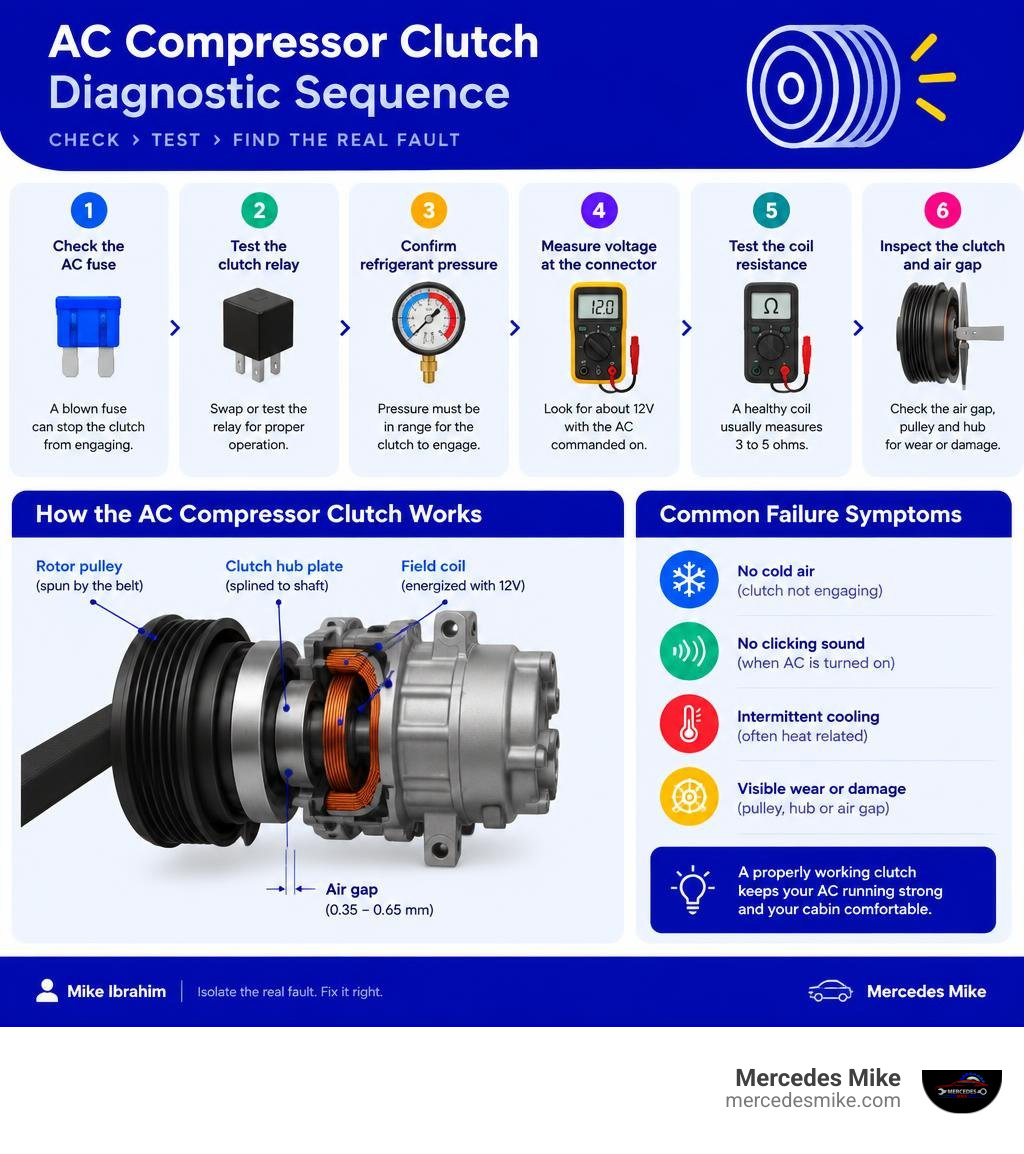
To fix an AC compressor clutch, start with the low-cost electrical checks: inspect the AC fuse, swap or test the clutch relay, confirm refrigerant pressure is in range, and measure voltage at the clutch connector. If the connector gets about 12V with the AC commanded on but the clutch does not click, test the coil resistance and inspect the clutch air gap, pulley, and hub.
A blown fuse, weak relay, bad pressure switch, damaged wire, or poor ground can stop clutch engagement. These are often far cheaper to repair than a compressor. A healthy clutch coil commonly measures about 3 to 5 ohms, though your vehicle's factory specification is the final word.
Do not jump wires or apply battery power until you identify the correct terminals in a wiring diagram. A bypass is a brief diagnostic test, not a permanent repair, and it can defeat protections that prevent compressor damage.
I am Mike Ibrahim, and the next steps will help you isolate the real AC clutch fault before spending money on major parts.
How the AC Compressor Clutch Works and Common Failure Symptoms
The air conditioning compressor clutch acts as the mechanical gatekeeper between your vehicle's spinning accessory drive belt and the internal pistons or scrolls of the AC compressor. It consists of three primary components: an electromagnetic field coil mounted rigidly to the compressor housing, a rotor pulley riding on an internal ball bearing spun continuously by the serpentine belt, and a clutch hub plate splined directly to the compressor’s input shaft.
When you turn on the climate control inside the cabin, the engine computer or climate control module energizes the field coil with 12 volts. This creates a strong magnetic field that pulls the clutch hub plate tight against the rotating pulley face. Friction locks the two pieces together, spinning the internal shaft to compress refrigerant and generate cold air. To function seamlessly, an exact air gap clearance (typically between 0.35 mm and 0.65 mm) must be maintained between the hub plate and pulley. If this gap becomes too wide through wear, or if the internal thermal protector blows due to excessive heat, the magnetic field cannot overcome the physical distance to pull the plate in.
Failure Symptom | Likely Category | Primary Suspects | Quick Inspection Check |
|---|---|---|---|
AC light illuminates, but center hub never spins | Electrical | Blown fuse, bad relay, tripped pressure switch, open coil | Check for 12V at connector; check coil resistance |
Loud squealing or grinding when engine runs (AC off) | Mechanical | Seized or worn pulley bearing | Spin pulley by hand with belt off; check for roughness |
AC works for 10 minutes, then blows warm air | Electrical/Thermal | Out-of-spec air gap, failing coil, thermal protector cutoff | Measure air gap with feeler gauge; check coil heat soak |
Squealing only when AC button is pressed | Mechanical/Load | Slipping clutch friction plate, partially seized compressor | Rotate center shaft by hand; inspect plate for glazing |
Clutch clicks repeatedly (rapid cycling) | System/Pressure | Low refrigerant charge, faulty low-pressure switch | Hook up manifold gauges; check system pressures |
Common Electrical Circuit Failures
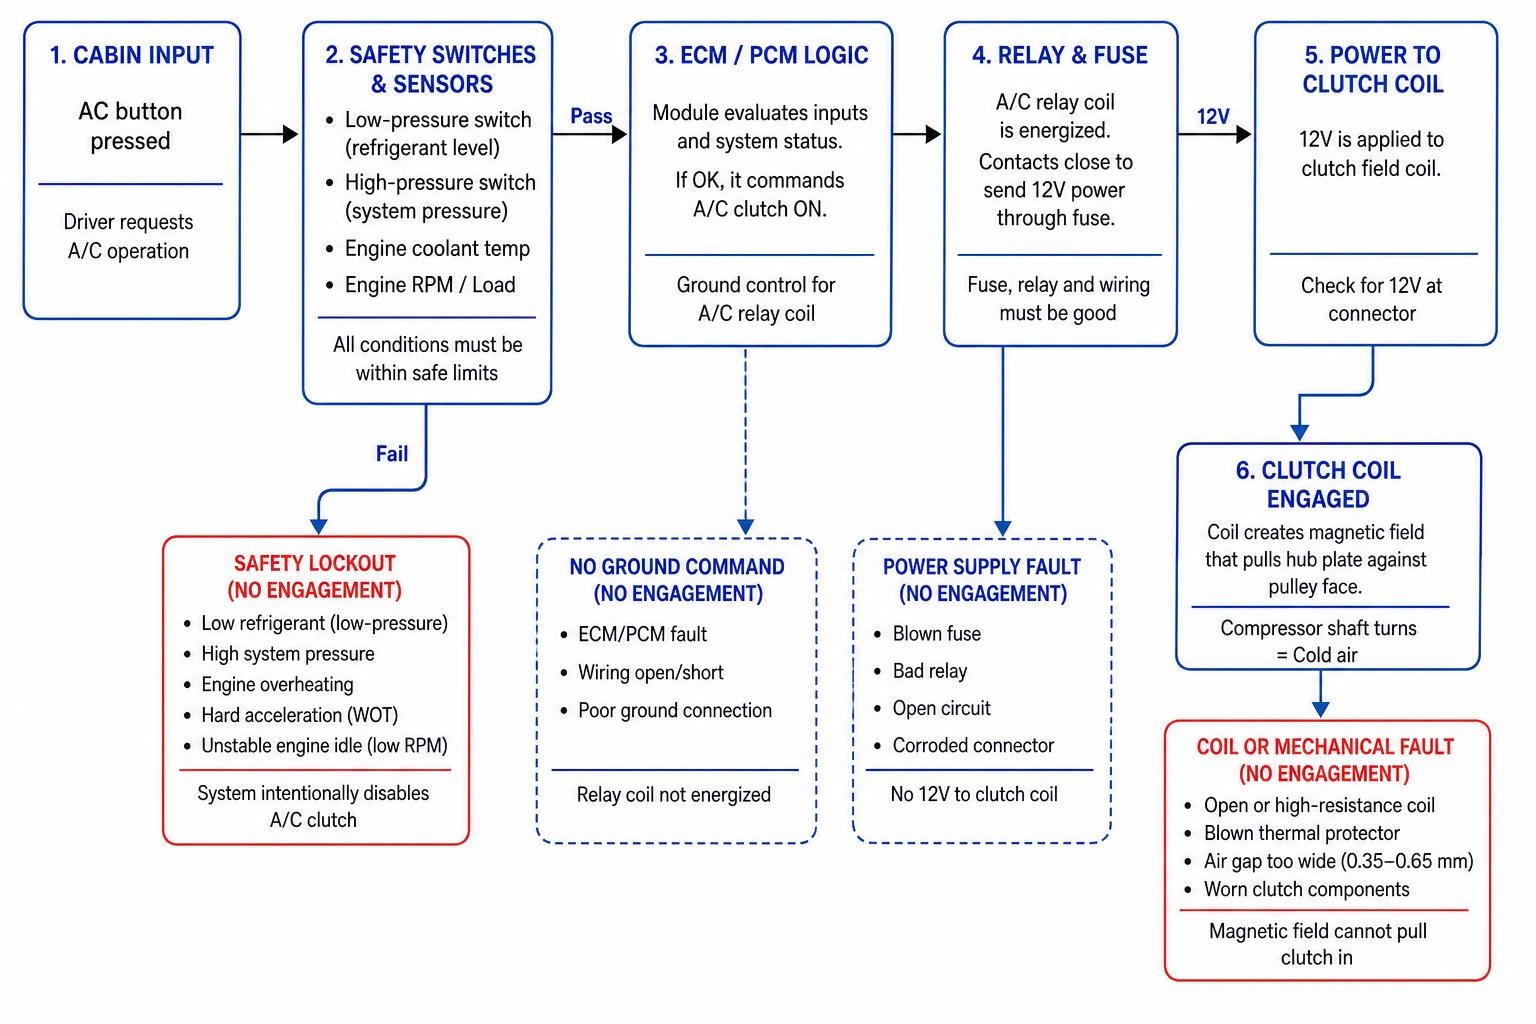
Before suspecting a ruined compressor, we always remind drivers that electrical interruptions account for the vast majority of non-engaging clutches. A simple blown fuse (costing roughly $1 to replace), a burned relay ($5 to $20), or a disconnected low-pressure safety switch ($15 to $50) can completely cut the power circuit.
Modern engine control modules (ECMs) and powertrain control modules (PCMs) actively manage the ground circuit for the AC relay. If the PCM detects that the refrigerant level has dropped below critical thresholds, the low-pressure switch opens to prevent the compressor from destroying itself due to oil starvation. Likewise, an over-pressurized condenser will trigger a high-pressure cut-off. If you are dealing with complex wiring or control module communication issues, seeking professional ac repair can quickly isolate whether the PCM is intentionally withholding the clutch command.
Mechanical Wear and Sensor Cutoffs
Mechanical wear can prevent physical engagement even when the electrical system delivers perfect voltage. Over tens of thousands of miles, the friction material on the clutch hub plate naturally erodes, widening the air gap beyond the reach of the magnetic field. Alternatively, a worn rotor bearing can cause the pulley to wobble, creating misalignment and heat that destroys the field coil windings.
Vehicle safety logic also commands temporary mechanical disengagement. Your car's computer will automatically disable the AC clutch under conditions such as:
Engine overheating (coolant temperatures exceeding safe thresholds)
Hard acceleration (wide-open throttle to give maximum power to the wheels)
Unstable engine idle speeds (RPM dropping below safe limits)
Furthermore, low refrigerant levels caused by system leaks will trip sensor cutoffs, which requires a complete refrigerant leak repair before the clutch will engage again.
Systematic Diagnostics: Testing the Clutch Circuit and Field Coil
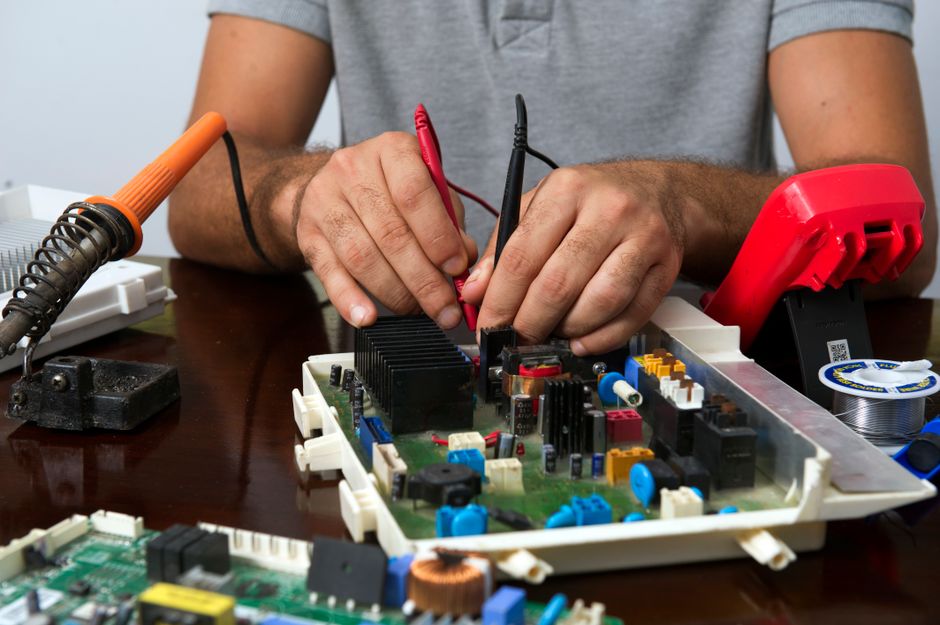
To avoid replacing expensive components that are still working properly, follow a step-by-step diagnostic process using a digital multimeter, a basic 12V test light, and safety equipment.
Testing Electrical Inputs to Fix AC Compressor Clutch Failures
When diagnosing an inoperative system, the first step is verifying whether power is reaching the compressor. Locate your vehicle's under-hood fuse and relay box. Identify the AC clutch relay using the diagram on the fuse box lid.
Perform a Relay Swap: Locate an identical, non-critical relay in the fuse box (such as the horn or rear defroster relay) and swap it with the AC clutch relay. Start the car and turn on the AC. If the clutch engages, the original relay is bad.
Jump the Relay Socket: If swapping relays produces no result, remove the relay. Identify the power supply terminal (connected to battery power) and the load terminal leading to the compressor clutch coil. Using an insulated jumper wire, bridge these two terminals momentarily with the engine off but ignition on. You should hear a sharp, metallic "click" as the clutch plate pulls into the pulley. For specific pin-out sequences, technicians frequently rely on the OEM A/C compressor clutch circuit troubleshooting guide to avoid bridging the wrong terminals.
Check Connector Voltage: Unplug the electrical harness connector directly at the AC compressor. Set your multimeter to DC Volts. Connect the positive meter probe to the hot terminal of the harness and the negative probe to clean chassis ground. With the engine running and the AC turned ON inside the car, your meter should read battery voltage (~12V to 14V). If you have 12V at the connector but no clutch movement, the problem is inside the clutch coil, thermal protector, or ground circuit.
Measuring Field Coil Resistance and Voltage
If battery voltage is reaching the compressor harness, set your multimeter to the Ohms (Ω) setting to test the health of the electromagnetic field coil:
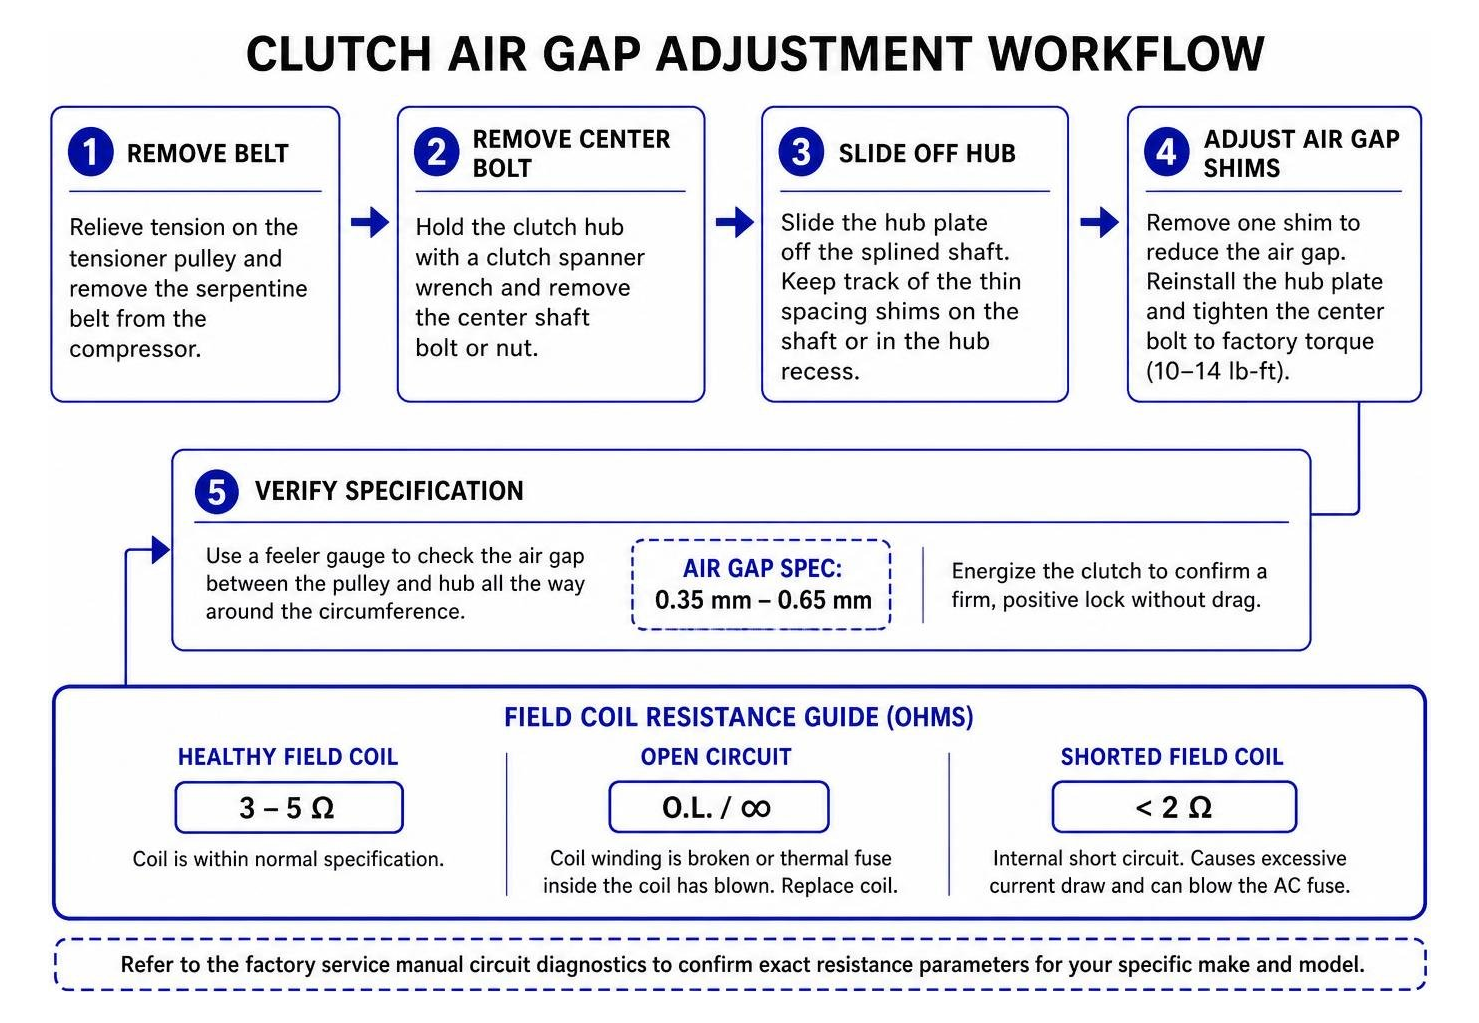
Healthy Field Coil: A standard automotive AC compressor clutch coil has an internal resistance between 3 and 5 ohms.
Open Circuit (Infinite Resistance / OL): If the meter reads "O.L." or infinite resistance, the internal coil winding is broken or the integrated thermal fuse inside the coil has blown from overheating. The coil must be replaced.
Shorted Field Coil (Below 2 Ohms): A resistance reading below 2 ohms indicates an internal short circuit. This condition pulls excessive current and will repeatedly blow the AC fuse in your fuse box.
Refer to established factory service manual circuit diagnostics to confirm exact resistance parameters for your specific make and model.
Step-by-Step Guide to Fix AC Compressor Clutch Issues
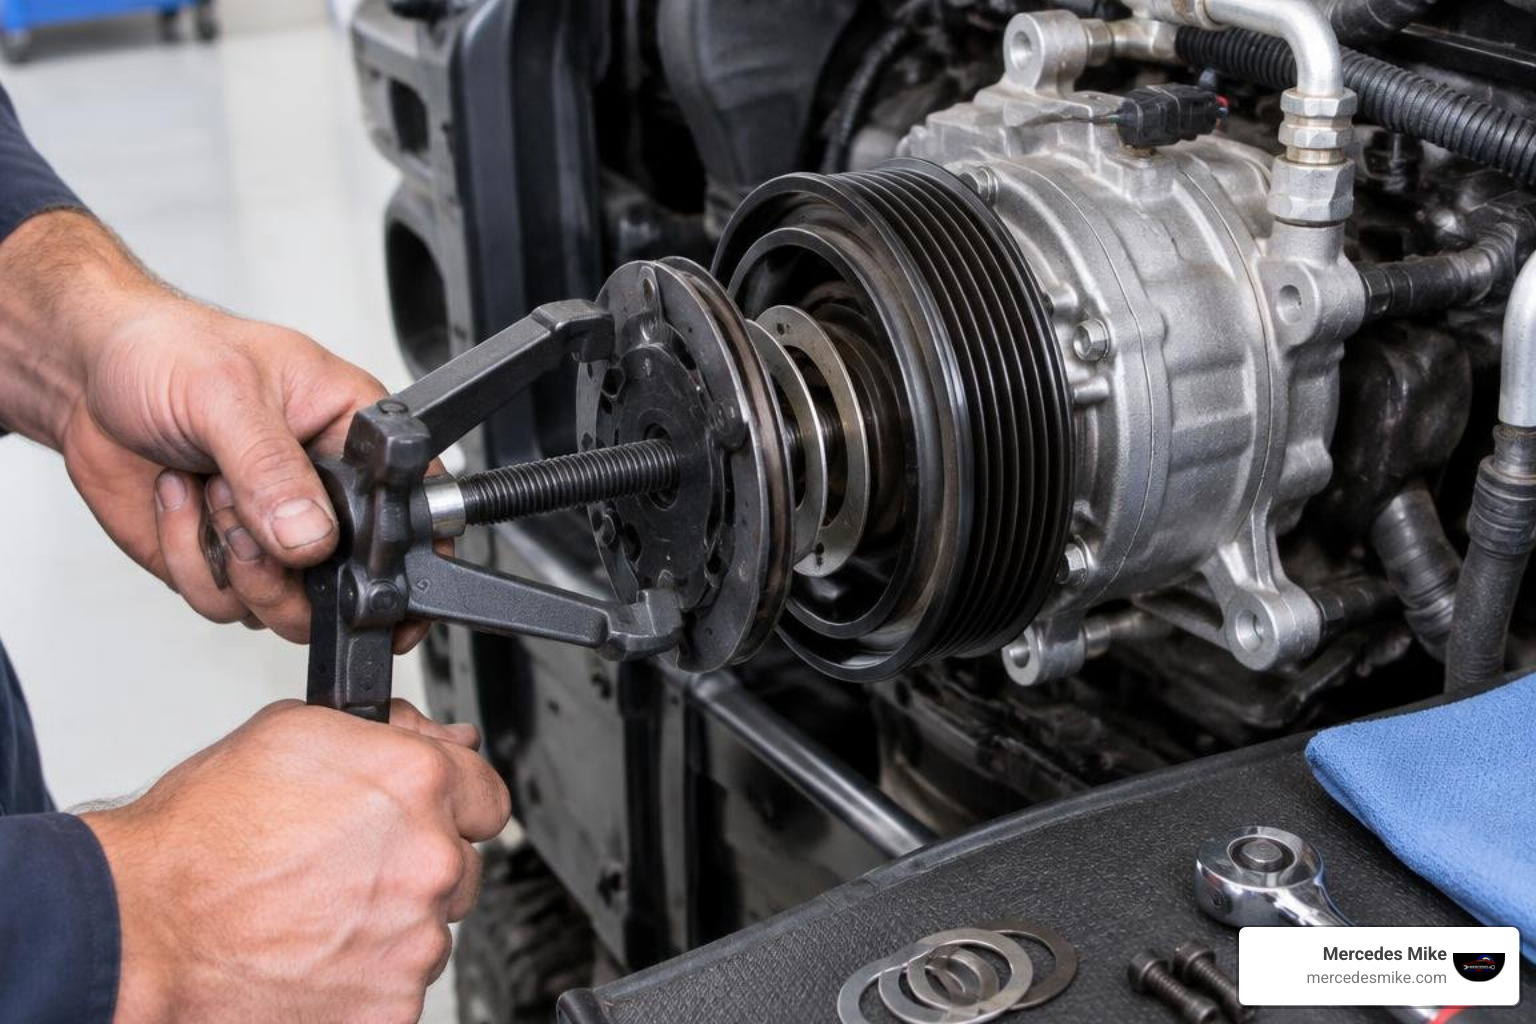
Once you have identified whether your issue is an inexpensive electrical part or worn clutch hardware, you can make the fix in your driveway using hand tools, a clutch hub holding tool, and snap ring pliers.
Replacing Relays, Fuses, and Low-Pressure Switches
For simple electrical failures, repairs are fast and require no refrigerant discharge:
Replace Fuses: Pull the blown AC fuse and replace it with a new fuse of the exact same amperage (commonly 7.5A, 10A, or 30A depending on the vehicle). Never install a higher-amp fuse to fix a blown circuit.
Install a New Relay: Insert a new OEM-grade relay into the socket and test system operation.
Replace the Low-Pressure Switch: Most modern vehicles feature a Schrader valve underneath the pressure switch, allowing you to unscrew and replace a faulty sensor without losing refrigerant. Once replaced, ensure the system has an accurate charge by performing a proper air conditioning recharge to match manufacturer weight specifications.
Mechanical Adjustments to Fix AC Compressor Clutch Slippage
If the field coil tests within the 3 to 5-ohm spec and 12 volts are present, but the clutch slips or fails to engage when warm, the air gap clearance is likely too wide.
Remove the Serpentine Belt: Relieve belt tension using a breaker bar on the tensioner pulley and slide the belt off the compressor.
Remove the Center Retaining Bolt: Hold the front clutch hub plate using a dedicated AC clutch spanner wrench. Use a socket wrench to remove the center shaft bolt or nut.
Slide Off the Clutch Hub: Gently pull the hub plate off the splined shaft. Keep track of the tiny washer-like spacing shims located on the shaft or inside the hub recess.
Adjust Air Gap Shims: Remove one small shim from the shaft to reduce the distance between the hub plate and the pulley. Reinstall the hub plate, tighten the center bolt to factory torque specs (usually 10–14 lb-ft), and insert a feeler gauge between the pulley and hub.
Verify Specification: Ensure the air gap measures cleanly between 0.35 mm and 0.65 mm around the entire circumference. If the gap is correct, energize the clutch to confirm a firm, positive lock without drag.
Repairing the Clutch vs. Replacing the Entire Compressor
Car owners often wonder if they should replace just the clutch assembly or buy a brand-new compressor. If the compressor spins smoothly by hand, makes no grinding noises, and your manifold pressure gauges confirm good high- and low-side pressures when engaged, replacing only the clutch kit (pulley, bearing, hub plate, and coil) is a practical, budget-friendly solution. A clutch rebuild kit costs significantly less than a new compressor and does not require opening the sealed refrigerant lines.
However, if the compressor shaft is seized, turns with heavy resistance, or metal shavings are found inside the manifold ports, internal mechanical failure has occurred. In that situation, putting a new clutch on a seized compressor will instantly burn out the new clutch. To evaluate total project expenses, check our updated car ac repair cost guide 2026. Many newer European luxury vehicles use clutchless, variable-displacement compressors that run continuously via internal swash plates and electronic control valves rather than external electromagnetic clutches.
Frequently Asked Questions About AC Compressor Clutch Repair
Can I drive my car if the AC compressor clutch is bad?
Yes, as long as the pulley bearing is still intact. If the failure is purely electrical or the air gap is too wide, the pulley will freewheel on its bearing without damaging the engine. However, if the pulley bearing itself is squealing, grinding, or wobbling, driving the vehicle can throw or shred the serpentine belt, causing an immediate loss of the alternator, water pump, and power steering.
Why is my AC clutch not engaging even when receiving 12V power?
If the clutch receives full battery voltage but fails to pull in, there are three common causes:
The air gap clearance has worn beyond the magnetic pull range of the coil (exceeding 0.8 mm).
The field coil windings are burned open or the internal thermal fuse has blown.
The ground circuit is corroded, broken, or suffering from excessive resistance.
How do I tell if the problem is the clutch coil or the compressor itself?
With the engine switched off and the serpentine belt removed, grip the center hub plate (not the outer pulley) with your fingers and rotate it. It should turn smoothly with slight, even resistance. If the center shaft will not turn or feels rough and locked, the compressor has seized internally. If the center shaft turns smoothly by hand, your issue lies in the clutch coil, relay, air gap, or electrical controls.
Conclusion
Fixing an AC compressor clutch does not have to involve expensive, unnecessary parts replacements. By systematically testing fuses, swapping relays, verifying pressure sensor continuity, and measuring coil resistance with a multimeter, you can pinpoint the exact fault in under an hour. Always address simple electrical checks before replacing mechanical components.
If you drive a precision European vehicle or find that internal compressor failure requires professional equipment, our team at Mercedes Mike provides specialized German automotive service across South Florida, including Pompano Beach and Deerfield Beach. For more details on full system pricing, explore our complete guide on the cost to fix ac compressor assemblies.